Recover Faded Color in 1970s Photos: Practical Steps and an Example
Updated
Restore faded 1970s photo colors on a digital copy. Compare a real kitchen before-and-after, learn color correction steps, and understand AI recoloring limits.
Upload Your Photo To Restore NOW – FREE Preview
Drag & drop or click to select • JPG, PNG, WebP, HEIC
FREE Preview • Review your result before purchasing
To improve a faded 1970s color photo, make a digital copy, assess the color cast, adjust color and contrast, then compare the result with the original. Correcting a faded color print is different from adding color to a black-and-white image. An attractive result is not proof that every original color has been recovered.
- Keep the original unchanged. Scan or photograph it, save an untouched master and edit a separate copy.
- Identify the problem. Is the whole image pink, yellow or washed out, or is the damage confined to one area?
- Try a restrained correction. Use adjustment layers for manual edits, or examine an AI preview of the same digital copy.
- Compare important details. Check faces, clothes and any writing as well as the overall color. Look for invented texture or changes in likeness.
- Save both versions. Label a recolored or reconstructed result so it is not mistaken for an untouched historical record.
A real example: a warm-tinted kitchen photograph
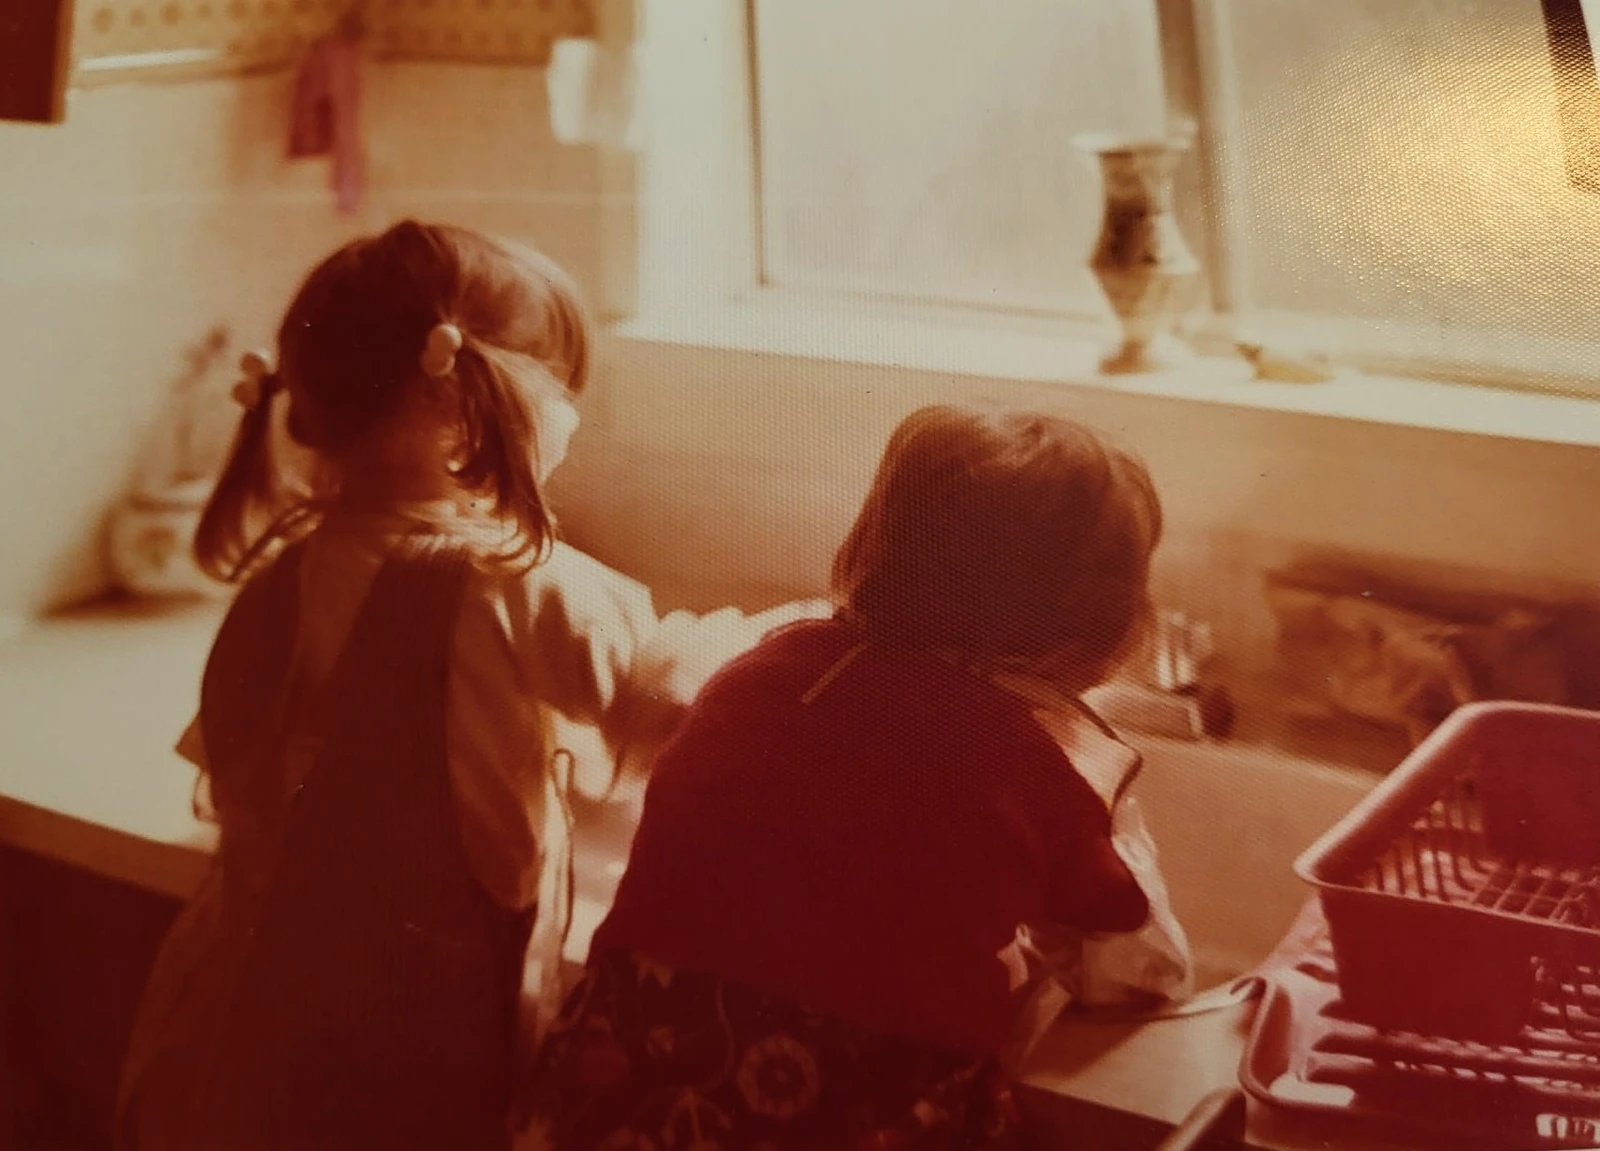
This pair is from the reviewed ImageRestoreAI gallery. It illustrates a warm color cast; the photograph's exact date has not been verified, so it is not evidence of a specifically 1970s restoration.
Before — original upload
After — AI result
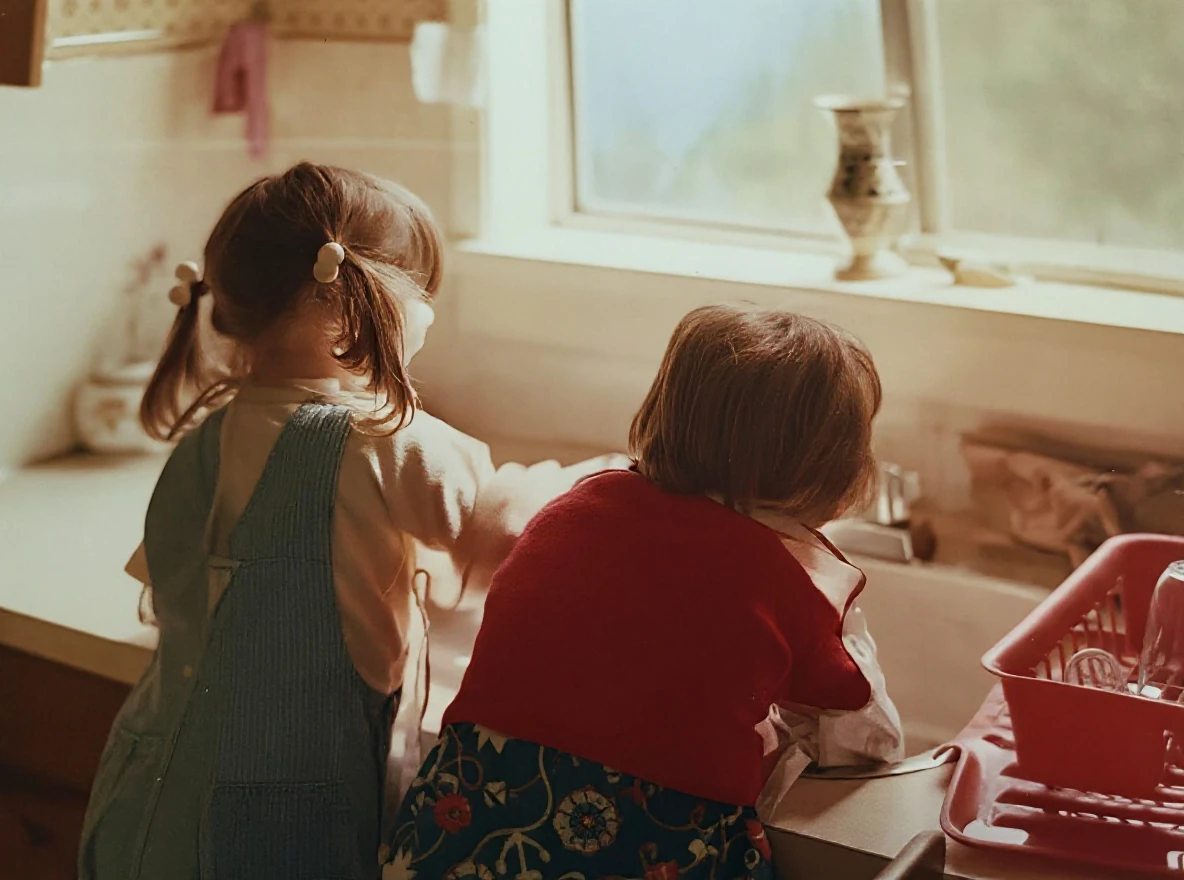
The warm cast is reduced and details appear clearer. Recoloring was requested for this result. Clothing colors and fabric patterns are inferred, not verified recovery of the original scene. The output also differs slightly in framing. These are existing original/result files, not a controlled comparison of manual correction against AI.
Publication permission and the gallery review are recorded for September 10, 2026. Read the case notes and review method before deciding what changes would be acceptable in your own family photograph.
Understand the original before changing its color
A family collection from the 1970s can include color prints, slides, instant photographs and black-and-white images. They should not all be treated as the same material or assumed to have the same “vintage” palette.
MyHeritage's explanation of its photo features distinguishes restoration of an existing color photograph from colorization of a monochrome one. If your original is black and white, see our guide to colorizing black-and-white photos.
Common fading patterns to assess
Pink or magenta cast: Look at several parts of the picture rather than guessing from one shirt or wall. A global correction may help the overall cast but can make a previously acceptable area look green.
Yellow or amber cast: Compare skin, shadows and any object whose original color you actually know. Warm indoor lighting can be part of the original scene; making every surface neutral can remove that lighting.
Washed-out contrast: A picture can look faded because its tones have little separation, even when a strong color cast is absent. Try modest tonal adjustments before pushing saturation.
Uneven fading: Areas exposed differently, or affected by stains, may need separate adjustments. Correcting the entire picture to fix one patch can distort the rest.
These are visual checks, not a diagnosis of the print's chemistry. Do not infer an exact original dye formulation or date from the color cast alone.
Prepare a digital copy
Keep a full-frame master scan, including edges that may help you understand uneven fading. Make editing and upload copies from it. See the DPI guide for choosing scan resolution for your intended output.
If your scanner offers automatic enhancement, retain an uncorrected master as well as any corrected version. Follow the upload interface's supported formats and file limits; an archival master and an upload copy need not use identical settings.
This guide concerns digital editing. Do not apply cleaning liquids, solvents or abrasive treatments to a fragile print, and do not force a stuck or flaking photograph out of an album. Seek a photographic conservator's advice if handling the original could damage it.
Traditional Color Recovery Methods
Manual Color Correction Techniques
Work on adjustment layers so you can change or remove each correction without overwriting the scan. Adobe's photo restoration guide describes non-destructive editing and tools for faded color photographs.
Adobe Photoshop Color Balance: Use small changes to counteract a cast. Moving toward green can reduce magenta; moving toward blue can reduce yellow. Compare several areas after each adjustment rather than using one setting for every photo.
Curves Adjustment: Separate red, green and blue channel curves allow targeted changes. Start conservatively and watch for loss of highlight or shadow detail.
Selective Color Correction: Adjust specific color ranges independently when, for example, skin tones need correction but the background already looks acceptable.
Color Range Selections: Select a particular colored object or area for a local correction. Inspect the selection boundary for halos and abrupt transitions.
Layer-Based Corrections: Use masks and separate adjustment layers for different areas, retaining the ability to revise your work later.
A short manual workflow
- Open a copy of the scan and keep the original layer unchanged.
- Adjust tonal contrast gently; avoid clipping highlights or shadows that still contain detail.
- Reduce the dominant color cast using a color adjustment layer.
- Mask areas that need a different correction, such as a stain or a strongly faded edge.
- Compare at both full-image view and a detailed view. Reduce or remove an adjustment if it produces implausible skin tones or visible artifacts.
- Save an editable master and export a separate sharing copy.
More advanced workflows can separate luminance from color in Lab mode or separate texture from broad color changes. They require careful review and do not provide missing historical evidence simply by producing a plausible image.
Try an AI preview and review it critically
Upload a digital copy to ImageRestoreAI to try a free preview. You pay to access the restored result, with pricing shown before purchase. See the photo restoration cost guide for how to compare services and what is included.
Compare the preview against your unchanged original. The kitchen example shows why reduced fading should be assessed separately from inferred colors and textures. This guide does not claim automatic dating, a dedicated 1970s model or guaranteed recovery of original colors.
Family portraits
Check the person's likeness, hairline, expression and clothing. Use other known photographs as references where available. Era-appropriate fashion is not evidence that a specific person wore a particular color.
Indoor and outdoor photographs
Preserve intentional warm lighting when it is supported by the scene. Watch for skin becoming green, a sky being recolored implausibly, or a corrected background losing useful detail. Mixed lighting may need local rather than global correction.
Instant photographs and slides
Identify the type of original where possible and use a suitable digitization method. Do not assume that a workflow for a paper print will handle an instant print or transparency in the same way.
Managing Expectations for 1970s Photo Restoration
Severe Color Loss: Where little color information remains, a convincing output may rely on inference. A familiar-looking result is not a measurement of the original colors.
Chemical or Physical Damage: Missing information cannot be confirmed from nearby pixels alone. Keep a record of reconstructed areas, particularly on faces, uniforms or writing.
Multiple Damage Types: Fading combined with scratches or tears may require several adjustments. Our scratch-removal guide and gallery show what to examine.
When to stop: If an edit changes important details or removes evidence you want to preserve, keep a less altered version or request a human review with your reference images. Restoring visibility and producing a historical record are different goals.
Preserving Restored 1970s Photos
Digital File Management
Multiple Format Storage: Keep the untouched master, an editable restoration file where available, and separate versions for sharing or printing.
Color Profile Management: Preserve embedded profiles and follow the requirements of the destination application or print provider. Avoid changing profiles merely to make a preview look more saturated.
Metadata Preservation: Record any known date, people and location separately from guesses. Add the restoration date, tool and a note identifying recoloring or reconstruction.
Display and Sharing Options
Share the original alongside the edited version when historical accuracy matters. Check a print proof before ordering multiple copies, and keep backups of both versions.
A good starting point is a modest digital correction followed by a careful comparison. See the kitchen comparison to judge how improved clarity can coexist with uncertain color and detail.
Ready to try it yourself?
Upload your photo for a free preview. Compare faces, colors and detail before purchasing.
Upload Your Photo To Restore NOW – FREE Preview
Drag & drop or click to select • JPG, PNG, WebP, HEIC
FREE Preview • Review your result before purchasing